
Browse the guides
Creating a deck
Create, rename and delete decks, and change their settings.
A deck is a set of flashcards on one topic, such as a chapter's vocabulary. Students study one deck at a time.
Your decks
Select Decks in the sidebar to see every deck you own or help edit, newest changes first.
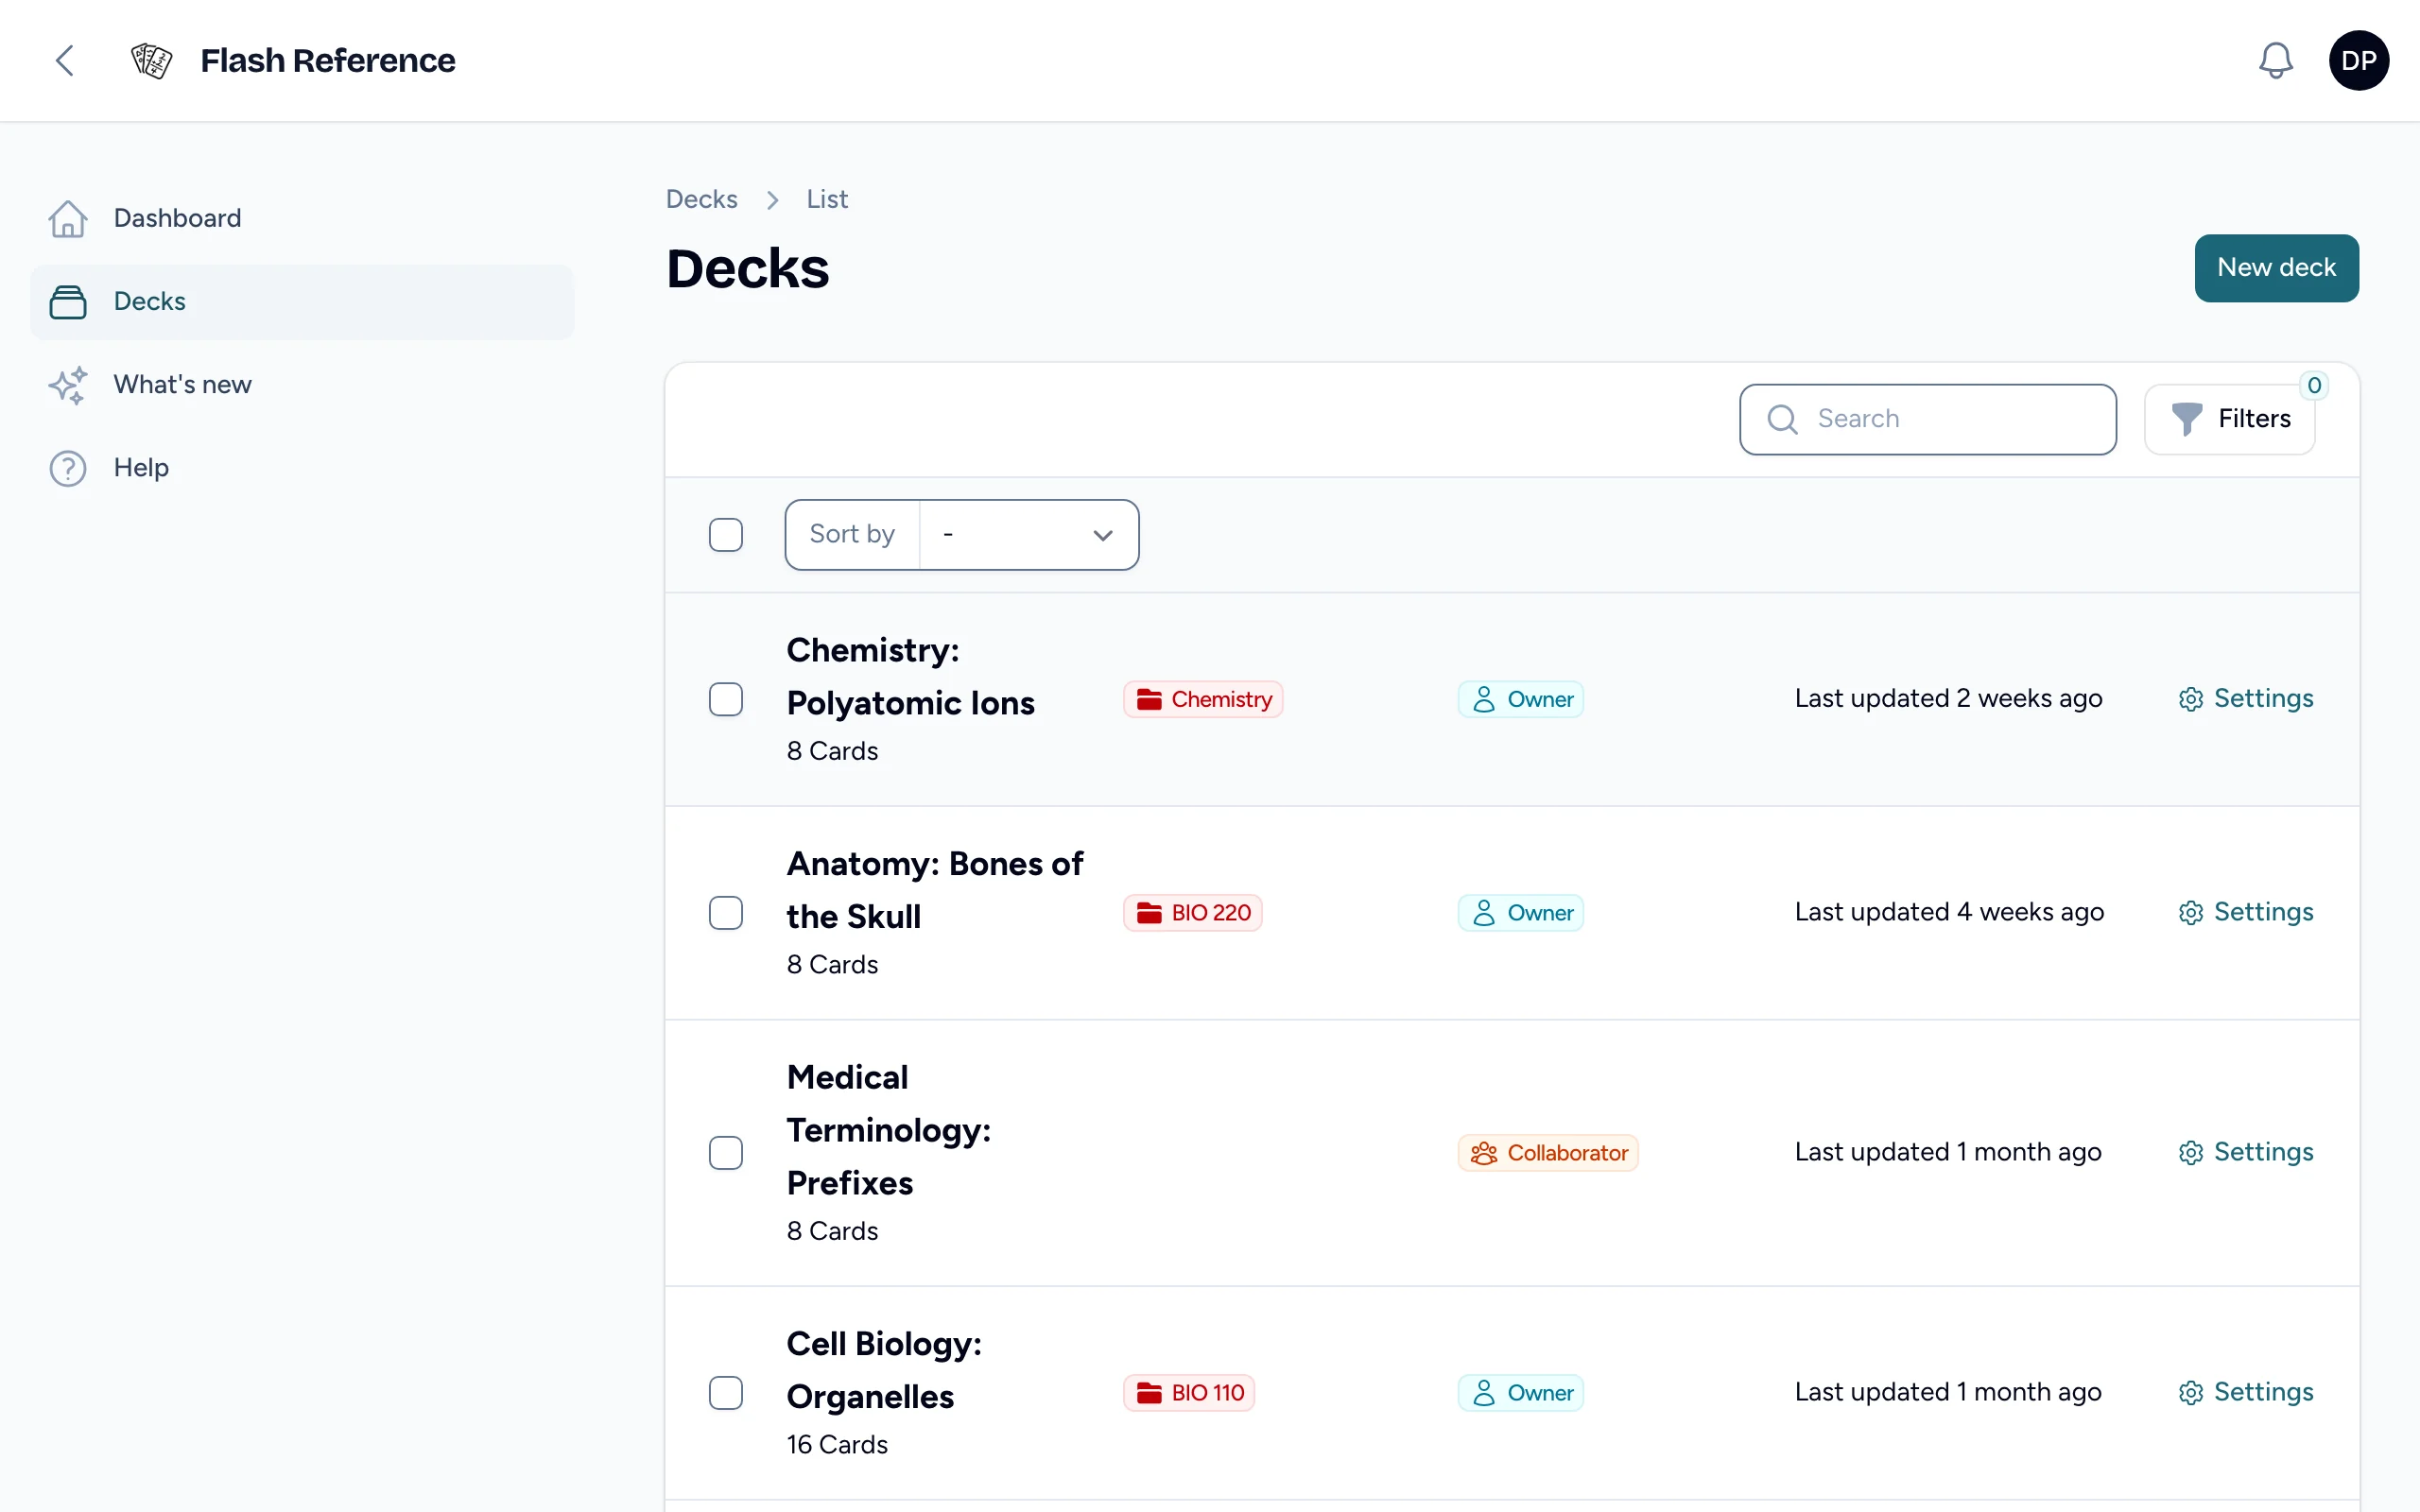
- Select a deck to open its cards.
- Select Settings on a deck's row to change its name, sharing, folders, study options or look. See Change a deck's settings.
- Search by name, or select Filters to show one folder's decks.
- Owner means it's your deck. Collaborator means someone else added you to help edit it.
Create a deck
-
Select New deck.
-
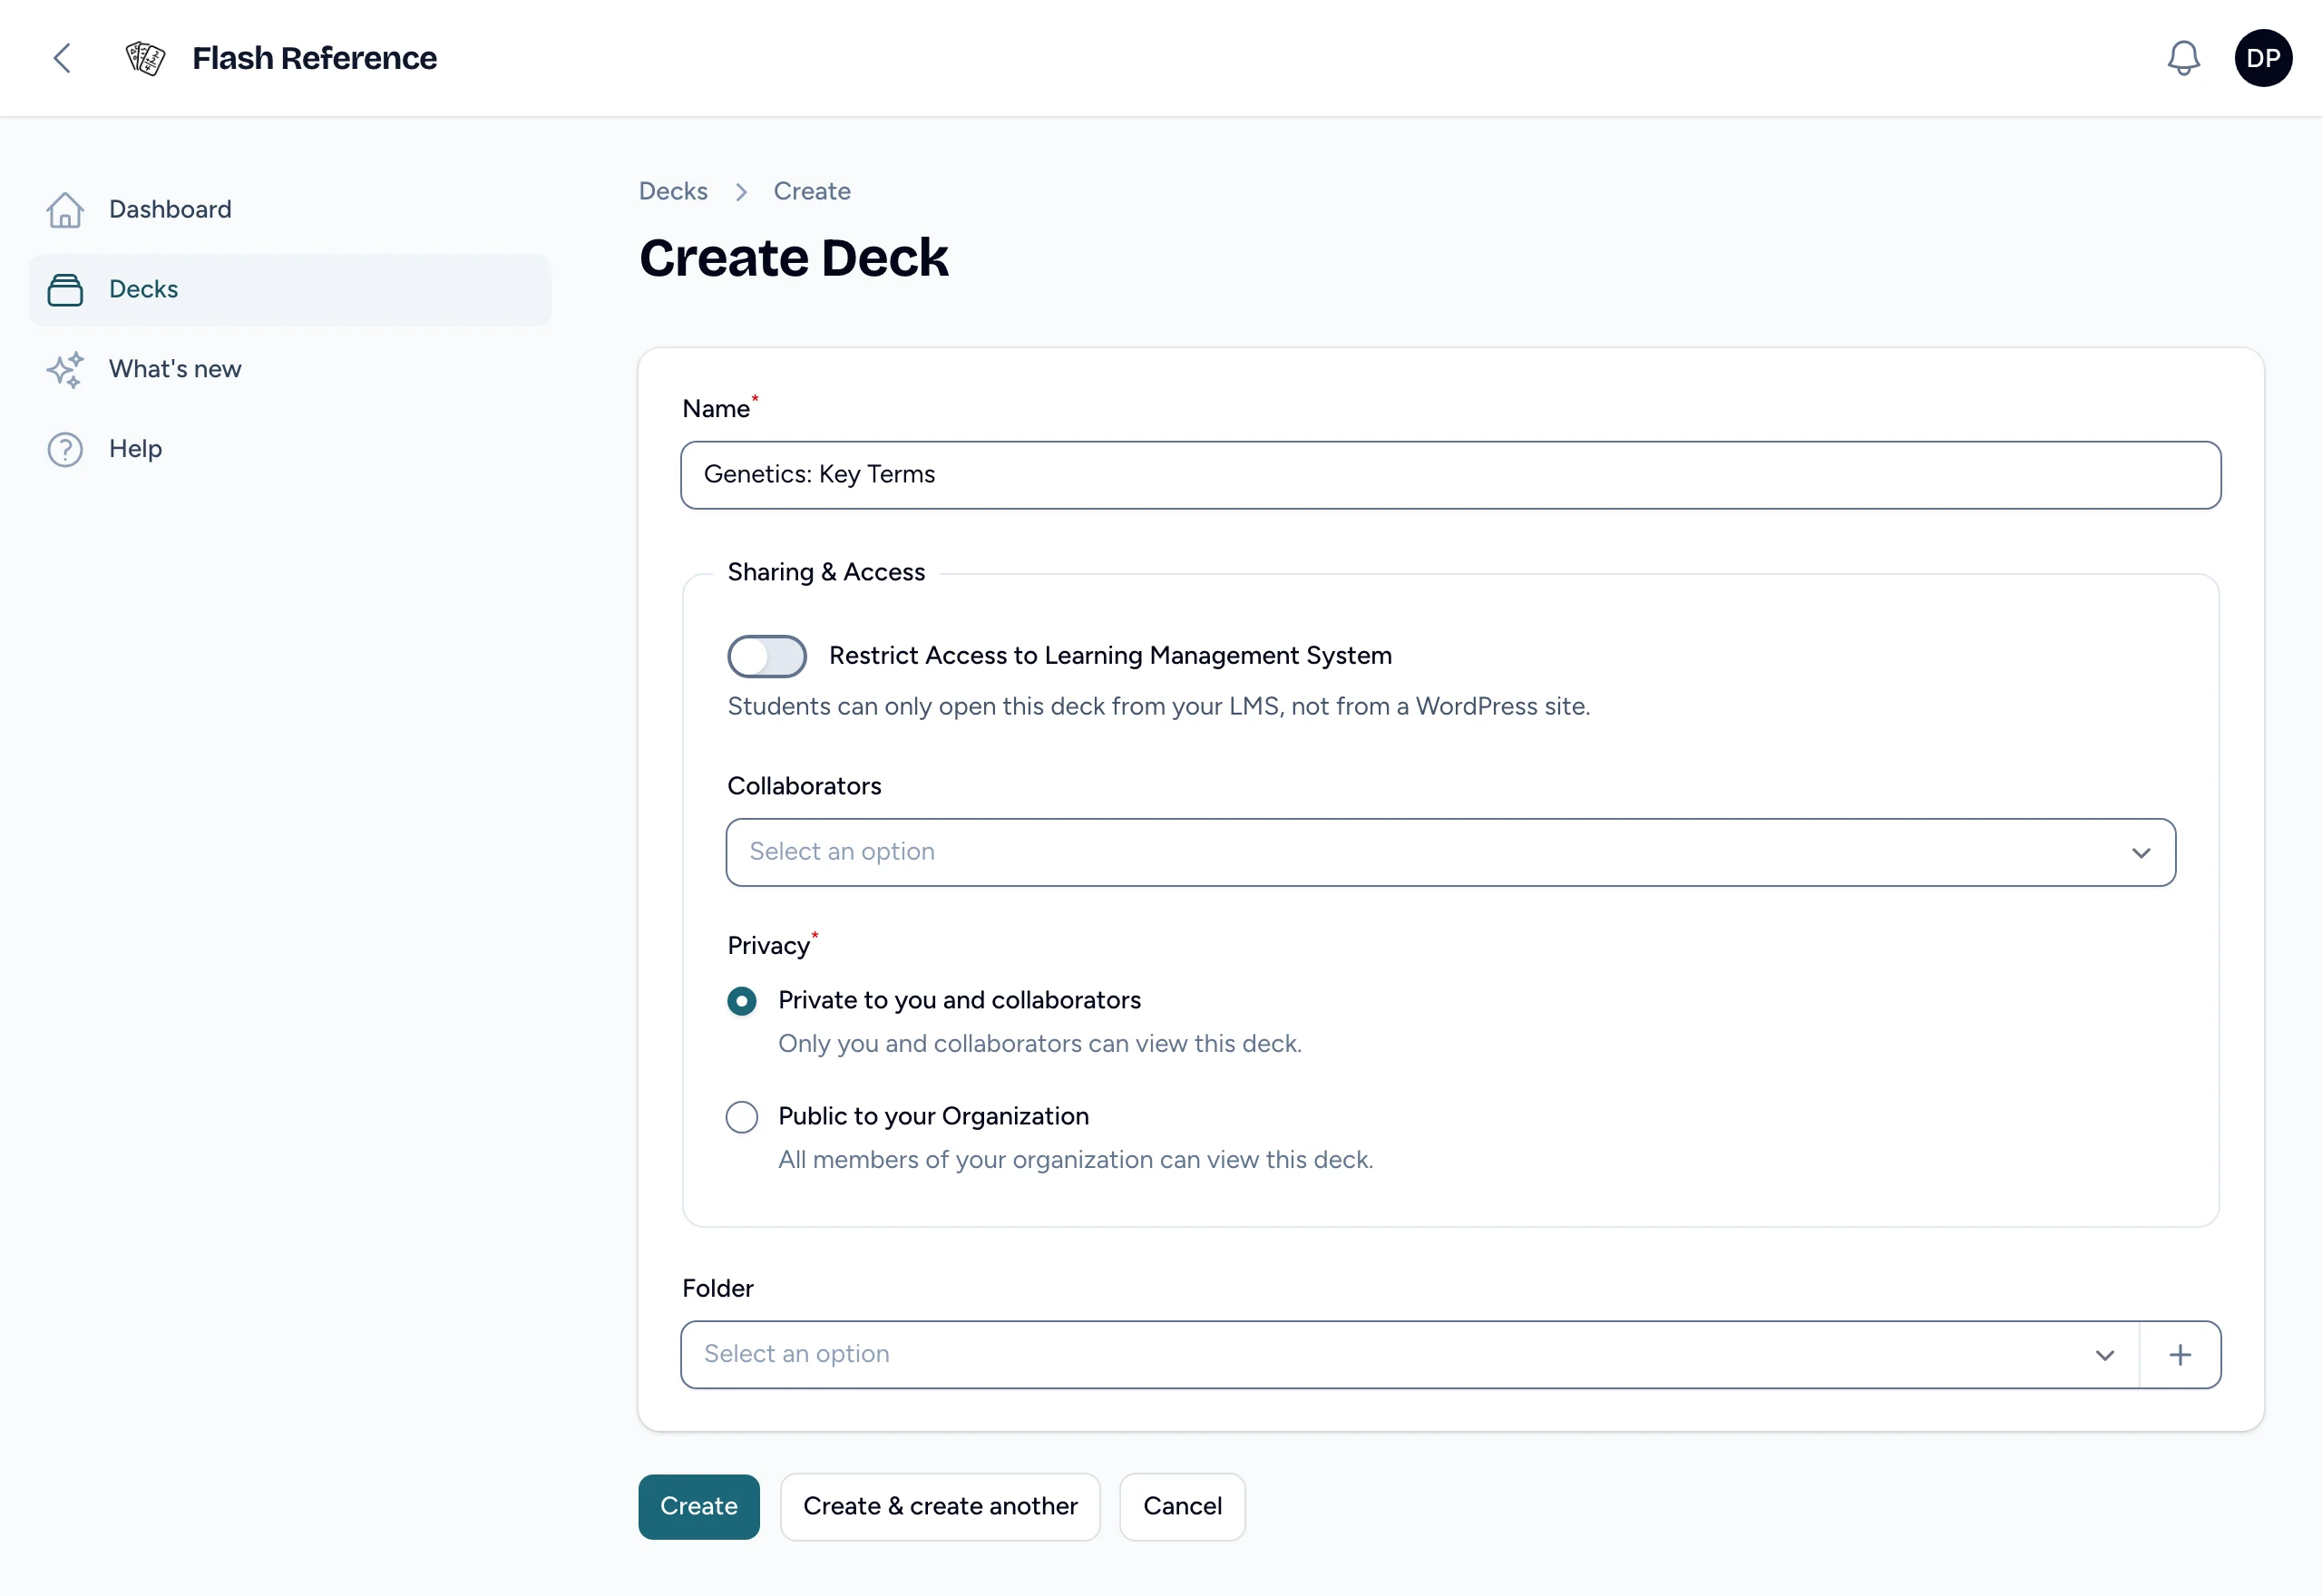
Give the deck a Name. Students see it in your course, so make it clear, such as Cell Biology: Organelles.
-
Optionally, choose:
- Restrict Access to Learning Management System: students can only open the deck from your LMS, not from a WordPress site.
- Collaborators: other instructors in your organization who can edit the deck with you.
- Privacy: keep it Private to you and collaborators, or make it Public to your Organization so other instructors can add it to their courses.
- Folder: one or more of your folders, to keep your decks organized.
Collaborators and sharing with your organization depend on your organization's plan. If your plan doesn't include them, they're turned off and say so.
-
Select Create.
The deck opens in the card editor, ready for cards. See Adding and editing cards, or Adding cards in bulk if you already have them in a list or spreadsheet.
Collaborators, privacy and folders are explained in Folders, collaborators and sharing.
Change a deck's settings
Select Settings on the deck's row in the list of decks, or at the top of the card editor. Its three tabs are:
- Details: the deck's Name, Sharing & Access and Folder, the same choices as when you created it. See Folders, collaborators and sharing.
- Study options: marking, multiple choice and spaced repetition. See Choosing how students study.
- Look and feel: the cards' colors, alignment and languages. See Card colors and languages.
Select Save changes to save all three tabs at once.
Rename a deck
Select Settings on the deck's row (or at the top of the card editor), change the Name on the Details tab, and select Save changes. Its links in your courses keep working.
Delete a deck
- In the list of decks, tick the box at the start of the deck's row.
- Open the bulk actions menu above the list and choose Delete selected.
- Confirm.
Deleting a deck can't be undone. Its cards and results are deleted with it, and the links to it in your courses stop working.